I can pinpoint exactly when my trading turned around. It wasn't when I found a better indicator. It wasn't when I learned Smart Money Concepts. It wasn't even when I improved my entries.
It was when I finally developed a proper exit strategy.
For years, I was obsessed with entries. "Where should I get in?" consumed 95% of my analysis time. The exit was always an afterthought — a fixed TP at some arbitrary level, or worse, closing the trade when my emotions told me to.
The truth that trading courses don't emphasize enough: your exit determines your profitability far more than your entry. You can have mediocre entries and still be profitable with excellent exits. But even perfect entries will lose money with poor exits.
The Problem With Fixed Take Profit Levels
Most beginners set a fixed take profit — 100 pips, 200 pips, 2:1 risk-reward. And that's fine as a starting framework. But fixed TPs have a fundamental flaw: they don't adapt to what the market is actually doing.
Here's a scenario I experienced hundreds of times:
I enter a long trade on gold. My fixed TP is 150 pips away. Price runs beautifully — hits 140 pips of profit. Then it reverses. Comes all the way back to my entry. I either get stopped at breakeven or, worse, it goes through for a loss. I was 140 pips in profit and ended with zero or negative.
The market was clearly telling me something at that 140-pip level — maybe it hit resistance, maybe the session was ending, maybe momentum died. But my rigid TP said "wait for 150" and I listened to the number instead of the market.
My Multi-Level Take Profit System
Instead of a single TP, I use three exit levels. Each one serves a different purpose:
TP1: The Safety Net (Partial Close)
Position: Usually at 1:1 risk-reward or at the nearest structural resistance/support.
Action: Close 30-40% of the position. Move stop loss to breakeven on the remaining lot.
Purpose: This secures profit early. Even if the trade reverses after TP1, I've already banked something. It also makes the remaining position psychologically stress-free — I'm now in a "free trade" with guaranteed profit.
TP2: The Target (Second Partial)
Position: At the next significant H1 or H4 structural level, or at 2:1 risk-reward — whichever is closer.
Action: Close another 30-40% of the remaining position. Tighten the trailing stop on what's left.
Purpose: This captures the core of the move. Most gold scalps that were going to be winners will reach this level. This is where the majority of my profit comes from.
TP3: The Runner (Let It Ride)
Position: No fixed level. This portion stays open with a trailing stop until the market takes it off.
Action: Trail the stop behind the EMA ribbon. When price closes below the EMA 21 (for longs) or above it (for shorts), the trail triggers.
Purpose: This captures the occasional home run. Some trades go much further than expected — continuation moves, breakout follow-throughs, strong session pushes. The runner catches that extra profit that a fixed TP would leave on the table.
Trailing Stop: Volatility-Based, Not Fixed Pips
Here's something that took me way too long to figure out: a fixed trailing stop (like "trail by 50 pips") is almost useless on gold. Gold's volatility changes dramatically throughout the day and week. During Asian session, 50 pips might be appropriate. During London, the same trail will get triggered by normal price noise.
My solution: I trail based on the EMA ribbon position rather than fixed pips.
For a long trade, my trailing stop sits below the EMA 34 or EMA 55 (depending on how aggressive I want to be). As price moves up, the EMAs move up with it, and my stop trails along underneath the ribbon. This means:
- In a fast-moving market, the EMAs adjust quickly, giving the trade room to breathe.
- In a slow market, the EMAs tighten up, protecting more profit.
- The trail is always proportional to current momentum and volatility — not some arbitrary number I picked.
When the ribbon compresses or starts to twist, I know the trend is weakening. That's when I tighten from EMA 55 to EMA 21. If price closes below the EMA 21, the trade is done.
The Breakeven Trap
This was the hardest lesson for me to learn, and I think it's one that most traders get wrong:
Moving to breakeven too early kills winning trades.
I used to move my stop to entry price the moment the trade showed any profit. It felt safe. It felt smart. "I can't lose now!" But the reality was that 60-70% of my trades that would have been winners were getting stopped out at breakeven because I didn't give them enough room.
Gold is volatile. It regularly pulls back 40-80 pips before continuing in the original direction. If your breakeven stop is sitting at your entry price and the pullback touches it — you're out of a perfectly valid trade with zero profit instead of catching the continuation.
When I actually move to breakeven:
- Only after TP1 is hit (30-40% already secured).
- Only if the pullback would need to break below the N-period low (for longs) to reach my entry.
- Never during the first 15 minutes of a trade. Give it room to develop.
When I DON'T move to breakeven:
- When the trade has only moved 20-30 pips in my favor. That's noise, not profit.
- During the London-New York overlap when volatility spikes. Normal pullbacks can easily hit a premature breakeven stop.
- When the EMA ribbon is still expanding. Expanding ribbon means momentum is increasing — don't tighten your stop during acceleration.
The Exit Signs I Watch For
Beyond TP levels and trailing stops, there are market conditions that tell me to exit immediately regardless of where my TP or trail is:
Ribbon compression after expansion. If the EMA ribbon was expanded and suddenly starts compressing, momentum is dying. I close the remaining position. There's no point holding through a range when I could re-enter on the next expansion.
Session boundary approaching. If I'm in a trade at 15:30 GMT and London is about to close, I take what I have. Holding through session transitions adds risk without proportional reward.
Sudden volume spike against my position. A large candle against my direction — especially one that breaks through the EMA ribbon — is a warning sign. Institutions might be entering the other side. Better to take a smaller profit now than hope it reverses.
Three consecutive candles against my position. One counter-candle is a pullback. Two is concerning. Three consecutive candles against my direction means the trend might be shifting. I'm out.
Risk-Reward Is Not What You Think
Every trading book talks about risk-reward ratios. "Only take trades with at least 2:1 R:R." That's good advice in principle, but it misses a crucial nuance.
With a multi-TP system, your effective risk-reward is dynamic. Let me show you with numbers:
Say I risk 100 pips (1R) on a trade. My three TPs are at 100, 200, and trailing.
- Scenario A — All three TPs hit: TP1 (40% at 1R) = 0.4R. TP2 (30% at 2R) = 0.6R. TP3 trail (30% at 3R) = 0.9R. Total = 1.9R. Effective R:R = 1.9:1
- Scenario B — TP1 hit, then stopped at breakeven: TP1 (40% at 1R) = 0.4R. Remainder (60% at 0R) = 0R. Total = 0.4R. Still positive!
- Scenario C — Stopped out: 100% at -1R = -1R.
Even Scenario B, which most traders would consider a "failed trade," still made 0.4R. Over hundreds of trades, these small wins add up significantly. The multi-TP system means you need fewer full winners to be net profitable.
Automating the Exit
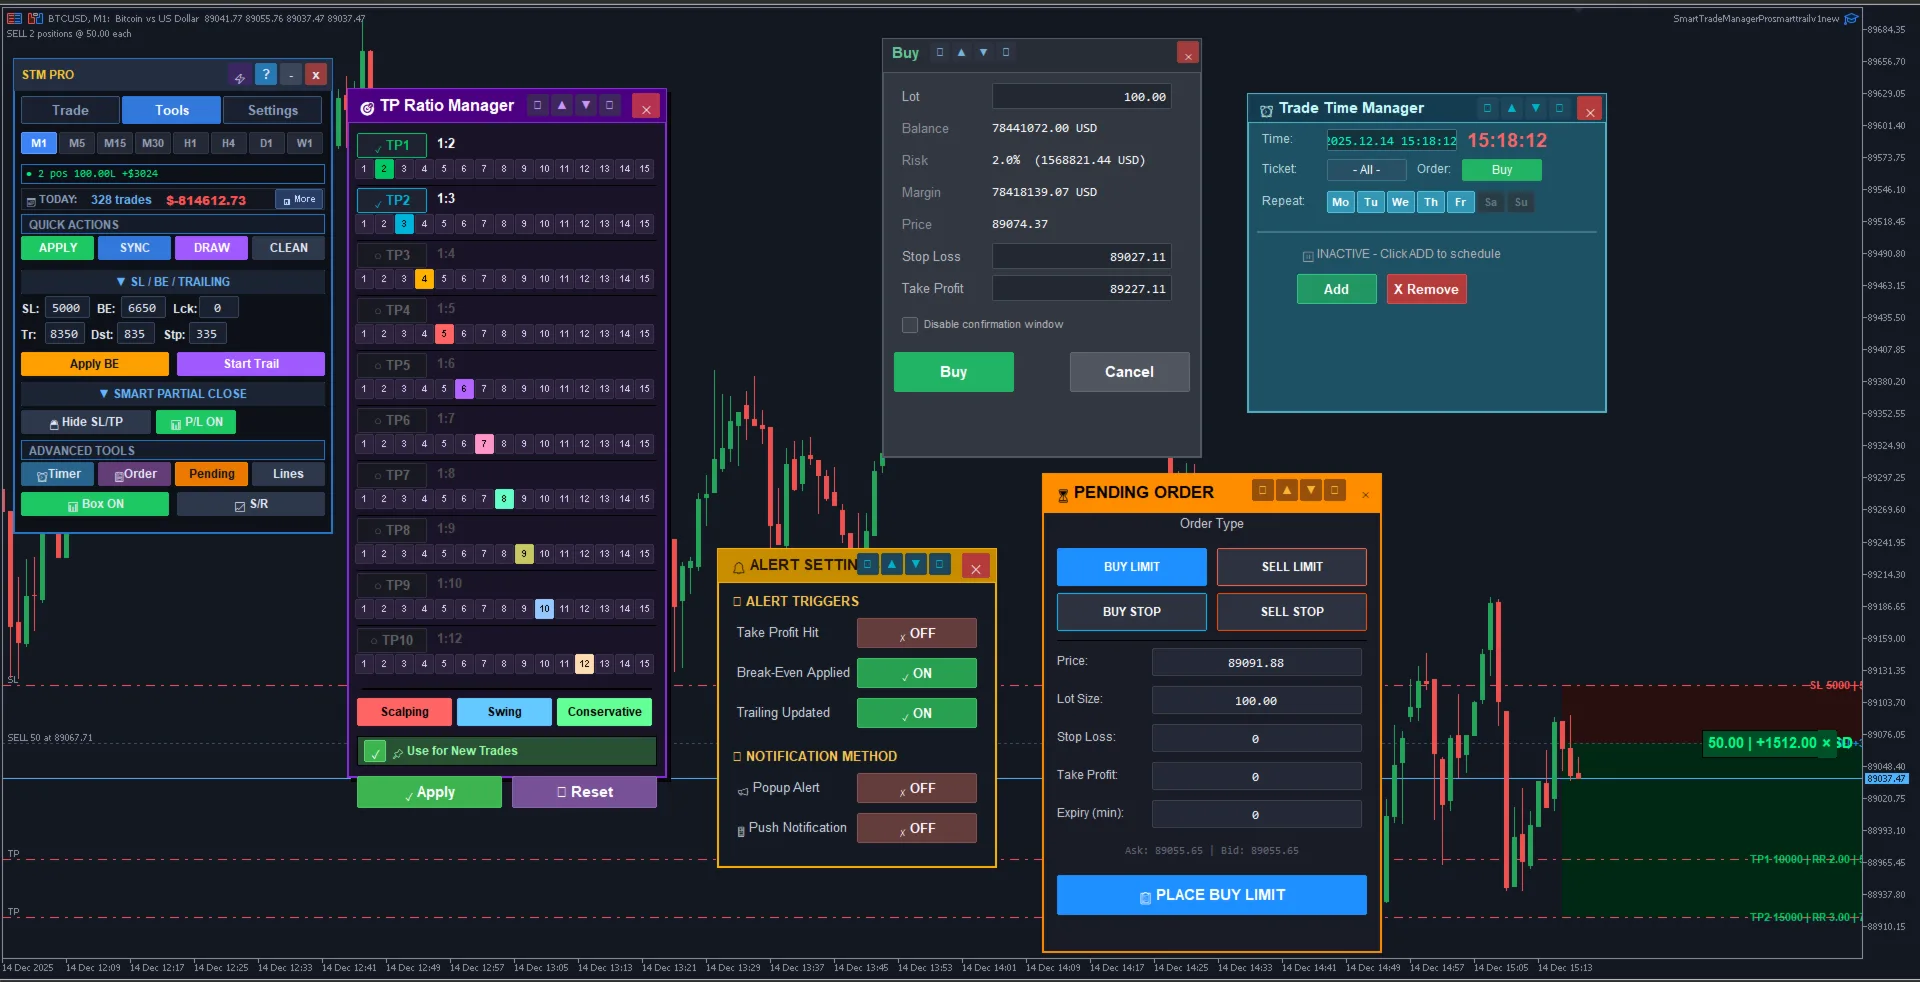
Managing exits manually is stressful and error-prone. You're watching the trade, emotions are running, and you either close too early (fear) or too late (greed). This is exactly why I built Smart Trade Manager Pro.
It handles everything I've described in this article automatically:
- Multi-level partial close (configurable percentages at each TP level).
- Automatic breakeven move after TP1.
- Volatility-based trailing stop that adapts to current market conditions.
- Session-aware closing — can auto-close positions before session end.
I use it on every trade. Not because I can't manage trades manually — I can. But because the tool removes emotion from the equation. It executes the plan exactly as defined, regardless of how I'm feeling in the moment.
Building Your Own Exit Rules
My multi-TP system works for my style of gold scalping. Your style might be different. But the principles are universal:
- Never use a single TP. Partial closing at multiple levels reduces variance and protects profit.
- Adapt your trail to volatility. Fixed pip trails don't work on instruments with variable volatility.
- Don't move to breakeven too early. Give the trade room to breathe before tightening.
- Have hard exit rules. Define specific market conditions that trigger an immediate close, regardless of TP or trail position.
- Automate if possible. Emotional exits are almost always bad exits.
Write your exit rules down before you trade. Read them before every session. Follow them without exception. This single change — treating exits with the same seriousness as entries — is what separates consistently profitable traders from the rest.
Disclaimer: This article describes my personal trade management approach and is not financial advice. The scenarios and examples are illustrative. Trading involves significant risk and past results do not guarantee future performance.